Peltier coolers, also known as thermoelectric coolers (TECs), offer an alternative approach to traditional CPU cooling. These solid-state devices transfer heat when electrical current flows through them, potentially achieving sub-ambient temperatures. This guide walks you through building a custom Peltier cooling system with dual all-in-one liquid coolers.
Understanding Peltier Coolers and Their Applications
A Peltier module consists of two ceramic plates with semiconductor elements sandwiched between them. When DC power flows through the module, one side becomes cold while the other becomes hot. The temperature difference can reach 60-70°C between sides.
These modules work on the Peltier effect. Heat pumps from the cold side to the hot side, requiring you to dissipate both the CPU’s heat output and the Peltier’s own thermal load. This is why dual cooling systems become necessary.
Peltier coolers suit extreme overclocking, competitive benchmarking, or experimental projects. They are not practical for everyday use due to high power consumption and complexity.
Components You’ll Need
Gather these components before starting your build:
- One high-wattage Peltier module (typically 150-226W, sized 40x40mm or 50x50mm)
- Two all-in-one liquid coolers (240mm or larger radiators recommended)
- Thermal paste (high-quality, non-conductive)
- Copper shims (matching Peltier dimensions, 1-3mm thick)
- DC power supply (12V, capable of 15-20A minimum)
- Insulation foam (closed-cell neoprene or similar)
- Thermal adhesive or thermal pads
- Digital multimeter
- Temperature monitoring software
- Kapton tape or electrical tape
Choose your Peltier module based on your CPU’s thermal output. A 150W module works for most mainstream processors, while high-end chips may need 226W units.
Safety Precautions and Warnings
Peltier cooling carries significant risks. The cold side can drop below the dew point, causing condensation on electrical components. This moisture can destroy your motherboard and CPU.
Never run a Peltier system without proper insulation. Always monitor temperatures during operation. Keep fire safety equipment nearby when testing.
Peltier modules draw substantial current. Ensure your power supply has adequate capacity with headroom. Calculate total power draw: Peltier wattage plus both AIO pump and fan power.
This modification voids your hardware warranties. Proceed only if you accept the risk of permanent component damage.
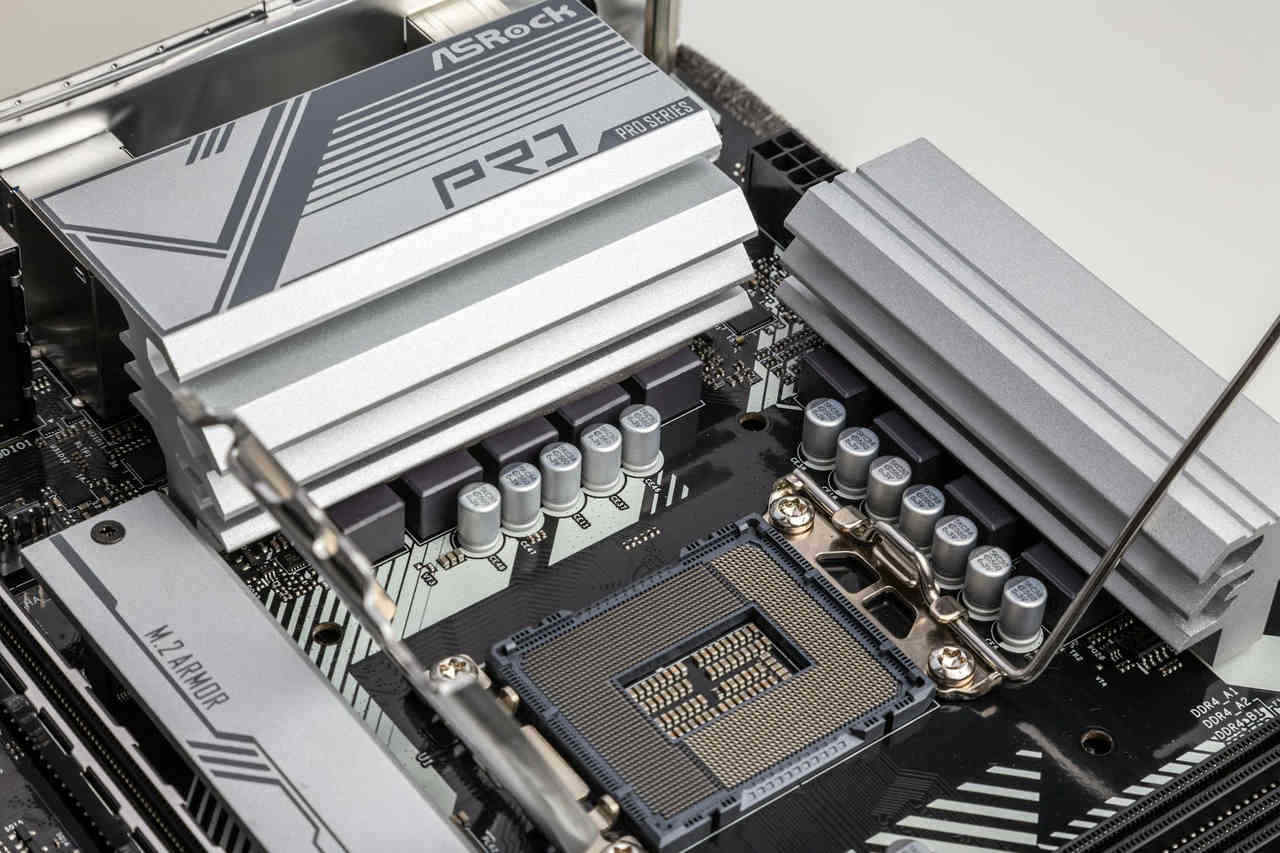
Step 1: Preparing the Peltier Module
Inspect your Peltier module carefully. Identify the cold and hot sides—manufacturers usually mark them, or the wires indicate polarity (red is positive, typically the hot side in standard orientation).
Clean both ceramic surfaces with isopropyl alcohol. Remove any manufacturing residue or oils. The surfaces must be completely clean for proper thermal transfer.
Test the module before installation. Connect it briefly to your power supply and verify the temperature difference. The cold side should become noticeably cool within seconds.
Apply thermal adhesive or high-performance thermal pads to attach copper shims to each side of the Peltier. Copper shims help distribute heat evenly and protect the fragile ceramic surfaces from mounting pressure. Clamp or weight the assembly while the adhesive cures according to manufacturer instructions.
Step 2: Installing the First AIO (Cold Side)
Mount the first AIO cooler to your CPU as you normally would, but do not attach the cold plate yet. You need access to prepare the mounting area.
Clean the CPU’s integrated heat spreader thoroughly. Apply a thin, even layer of thermal paste to the CPU surface.
Carefully position the Peltier module (with copper shims attached) onto the CPU. The cold side goes down toward the processor. Ensure the module centres over the CPU die location.
Apply thermal paste to the top of the Peltier assembly. Mount the first AIO cold plate on top, securing it with the standard mounting mechanism. Tighten screws gradually in a cross pattern to distribute pressure evenly. Avoid overtightening—Peltier modules are fragile and excessive force can damage them, potentially void your hardware warranties.
Step 3: Mounting the Second AIO (Hot Side)
The second AIO handles the Peltier’s hot side and must attach directly to the same assembly. This requires custom mounting.
Remove the mounting brackets from the second AIO cold plate. You’ll create a sandwich: CPU, Peltier module, first AIO, and second AIO cold plate on top.
Apply thermal paste to the exposed top surface of the first AIO cold plate. Position the second AIO cold plate on top. Secure the two cold plates together using long screws, custom brackets, or strong spring-loaded clamps.
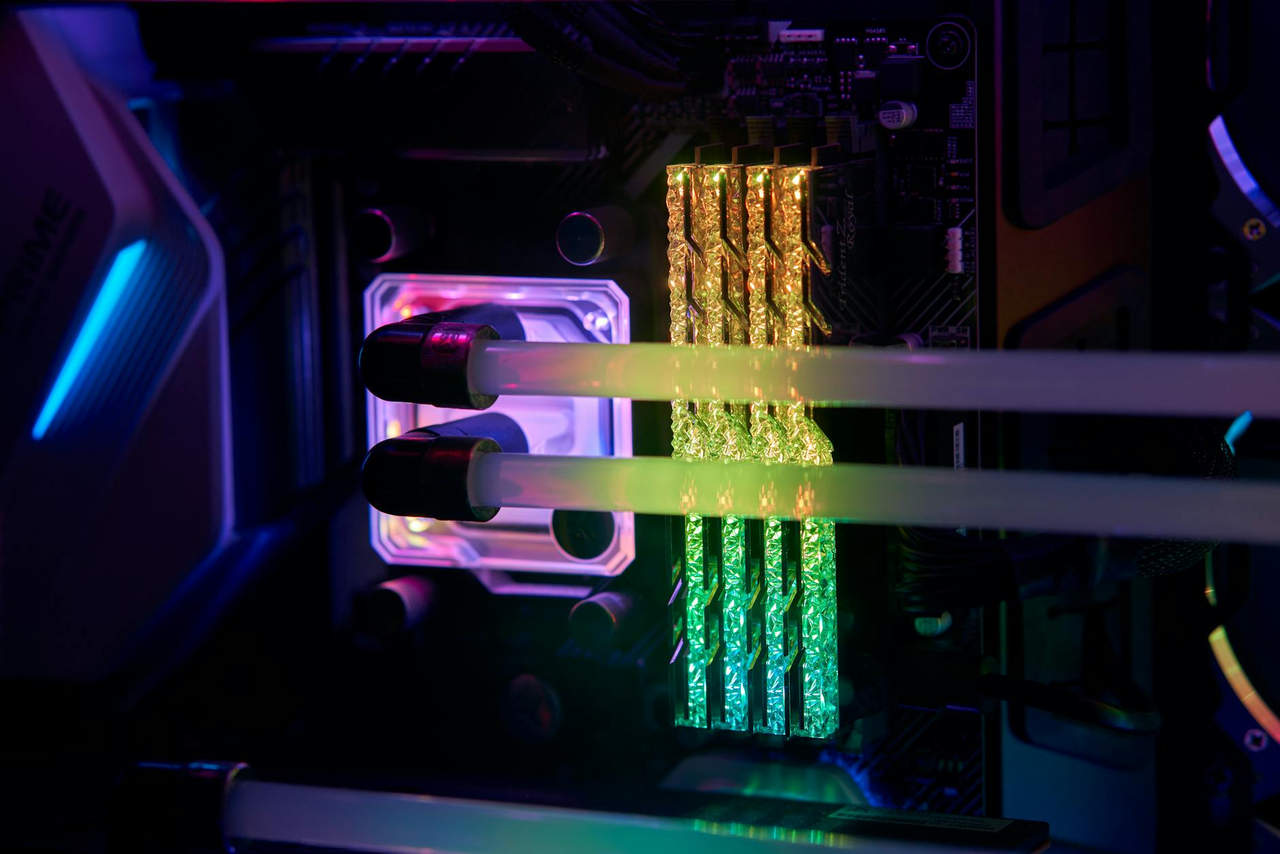
This dual-AIO configuration means both pumps and radiators will be running simultaneously. Plan your case’s radiator mounting locations accordingly—you need space for two 240mm (or larger) radiators with good airflow.
Step 4: Insulation and Condensation Prevention
Insulation is critical. Even small amounts of condensation can cause short circuits.
Cut closed-cell foam to create a barrier around the CPU socket. The foam should seal the gap between the cooler assembly and the motherboard. Create a gasket that prevents humid air from reaching cold surfaces.
Apply the foam carefully around the socket, ensuring complete coverage. Use additional foam pieces to seal any gaps where the mounting hardware penetrates.
Wrap exposed cold sections with Kapton tape. This includes any visible portions of the Peltier module and the lower AIO cold plate.
Consider applying a conformal coating to the motherboard area around the socket as an extra precaution. This creates a moisture-resistant barrier on circuit board traces.
Step 5: Wiring the Power Supply
Peltier modules require dedicated power separate from your PC’s power supply. Using your PC’s 12V rail for a high-wattage TEC can destabilize the system.
Connect your Peltier module to the external DC power supply. Verify polarity with your multimeter before applying power. Reversed polarity will heat the CPU instead of cooling it.
Add an inline fuse appropriate to your Peltier’s current draw. This provides protection against short circuits.
Consider installing a pulse-width modulation (PWM) controller to regulate Peltier power. This allows you to dial back cooling when full power isn’t needed, reducing condensation risk and power consumption.
Connect both AIO pumps and fans to your motherboard or fan controller as normal. Set up monitoring for all temperature sensors.
Step 6: Initial Testing and Temperature Monitoring
Your first power-on requires careful monitoring. Have your multimeter, thermal camera (if available), and temperature monitoring software ready.
Start with the Peltier powered off. Boot your system and verify normal operation. Check that both AIOs are functioning correctly.
Enable the Peltier at reduced power (50-75%) initially. Monitor CPU temperatures closely. They should drop rapidly—potentially below ambient temperature.
Watch for condensation. Check around the socket area every few minutes during the first hour. Look for moisture, fogging, or water droplets.
Run stress tests gradually. Start with light loads, then progress to full stress testing. CPU monitoring tools should show stable temperatures without wild fluctuations.
Optimizing Performance and Troubleshooting
Fine-tuning your Peltier system takes time. Adjust the power supply voltage to find the balance between maximum cooling and manageable heat output.
If your CPU temperatures remain high, the hot-side cooling is insufficient. Increase fan speeds on the second AIO or upgrade to a larger radiator.
Temperature oscillations indicate poor thermal contact somewhere in the stack. Disassemble, reapply thermal paste, and ensure even mounting pressure.
If condensation appears despite insulation, the Peltier is too powerful for your cooling capacity or ambient humidity is too high. Reduce Peltier power or improve environmental conditions.
Monitor power consumption at the wall. Peltier systems can add 200-300W to your total system draw. Ensure your main power supply and electrical circuit can handle the load.
Maintenance and Long-Term Considerations
Regular inspection is essential for Peltier cooling systems. Check for condensation weekly, especially after extended gaming sessions or stress testing.
Clean radiators monthly. Dust accumulation reduces cooling efficiency, which becomes critical when managing high thermal loads.
Replace thermal paste every six months. The thermal cycling from Peltier operation degrades paste faster than conventional cooling.
Monitor for insulation degradation. Foam can compress over time, creating gaps where moisture can enter. Replace seals annually or when visible wear appears.
Keep records of your temperatures and settings. This helps identify gradual performance degradation before it becomes problematic.
Alternatives and Considerations
Before committing to a Peltier build, consider whether simpler solutions meet your needs. High-end air coolers or single large AIOs handle most CPUs effectively without condensation risks.
Custom water cooling loops with large radiators and high-flow pumps often match Peltier performance with less complexity and power consumption.
Phase-change cooling offers superior sub-ambient performance for extreme overclocking, though it costs significantly more.
Peltier cooling makes sense primarily for learning experiences, specific competitive benchmarking scenarios, or when you specifically want the challenge of building an unconventional system.
The power consumption deserves serious consideration. Running a 200W Peltier continuously adds roughly 175 kWh monthly to your electricity bill, costing $15-30 depending on local rates.
Final Thoughts on DIY Peltier Cooling
Building a Peltier-based CPU cooling system is an advanced project that teaches valuable lessons about thermodynamics, electrical systems, and thermal management. Success requires attention to detail, particularly regarding insulation and condensation control.
The performance gains rarely justify the complexity for everyday computing. These systems shine in specific scenarios: extreme overclocking, educational projects, or personal challenges.
Start with modest expectations. Your first build may not achieve sub-zero temperatures. Focus on learning the principles and building experience.
Document your build thoroughly. Take photos during assembly and maintain detailed notes about configurations and results. This information proves invaluable for troubleshooting and helps the community learn from your experience.
If you decide to proceed, work methodically and prioritize safety. A successful Peltier cooling system represents a significant achievement in PC modification—but an unsuccessful one can be an expensive learning experience.